
You surely understand the paramount significance of maintaining the condition of your paintball gun. Let me tell you something crucial. A marker that’s all grime and filth can lead to severe jams and decreased accuracy. And that’s a one-way ticket to losing the game! So, keep that marker clean as a whistle if you want to come out on top.
This article will demonstrate how to clean a paintball gun properly. We attempted to cover everything from gun disassembly to cleaning the barrel and other components. You will be able to maintain your marker in excellent condition and ensure that every shot counts by the end of this article.
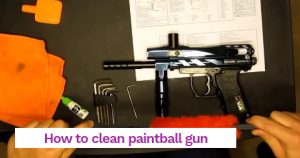
To get started with the process of cleaning, you will need the following supplies:
Oil | Q-tips | Grease | Warm water | Tooth-Brush | Extra O-rings | Cloth | Barrel swab or squeegee | Maintenance kit
Step 1: De-gas the Paintball Gun
One of the first things you should do when preparing your location is to de-gas your weapon. Most paintball markers use carbon dioxide (CO2) tanks, but others can run on propane or other gases. Make sure your gun is de-gassed before you start shooting with any gas. You should also protect the end of your barrel with a barrel cover. As a result, you won’t have to worry about shooting the weapon by accident when you’re fixing it or taking it apart. It can also stop the gas from escaping too quickly and harming you or your equipment.
Batteries are available for use with some paintball markers. Take out any batteries your model may need before working with it. Only leaving a battery in your pistol while cleaning it poses a risk, as batteries are readily damaged and leak quickly.
Step 2: Clean the Gun Barrel
- The pull-through squeegee should be inserted into the barrel after a tiny amount of gun solvent has been poured in. Repeat this pattern a few times until the entire surface is spotless, lifting the squeegee continuously.
- Remove residual solvent from the squeegee and scrub the gun with a toothbrush.
- Get some Q-tips and start wiping off the interior of the barrel. When cleaning, be careful to get into all the crevices.
- The last step is to use a Microfiber cloth to clean everything thoroughly. Drying the pistol thoroughly after wiping it off with a damp towel is essential if you don’t want the rust to ruin the barrel. After every combat, you must clean your barrel as quickly as possible. You’ll have to clean more frequently when the weather is wet or humid.
Step 3: Cleaning the Body
After the barrel has been polished, the rest of the gun may be cleaned. Please video capture the entire process of disassembling any small pieces. This will help you correctly assemble the Gun and ensure you get all the parts. To remove paint splatters, use a solvent-soaked rag or brush, followed by two dry rags. In very unusual circumstances, you may need to use warm water to flush off the obstinate muck from some components. Use solvent-soaked pipe cleaners to access inaccessible areas of your marker (such as the grip region), then follow up with dry pipe cleaners to remove any residue. Use a damp cloth to remove any remaining paint, dirt, muck, etc., from outside your marker, avoiding the O-rings and other vulnerable areas.
Step 4: Clean the Bolt and Hammer
You’ll need to take out the bolt and the hammer so you can wipe them down with some water. Again, use a microfiber cloth and be careful not to leave any fibers behind that might cause issues in the future. To avoid rust, let the parts air dry. It’s also a good idea to check the O-rings on the hammer and bolt while you’re at it. Black or brown rubber rings like this encircle several of the markers’ tiny bits and components. If they seem worn, you should replace them before putting together your paintball marker again.
You should also start developing your grip structure now. The grip frame, along with the barrel, is a component that will require extensive cleaning. Being so near to the barrel increases the likelihood that it will be covered in paint splashes. Thankfully, it’s a sturdy, wipe-down-friendly piece of furniture. Most of it can be scrubbed away with just your toothbrush and a cup of hot water. Make sure you’re taking your time and letting the artwork dry completely.
One crucial piece of advice is never to take apart the grip structure. There are a lot of small details in here that are nearly impossible to reassemble. If you need to open this part, have a professional take care of the cleaning instead of trying to do it yourself. The sheer number of tiny pieces would be too much for an experienced paintball player.
Step 5: Clean the Mask
If you’re a fan, you must appreciate the importance of a quality Mask on the paintball field. Let’s begin;
- Remove the lens from the mask with care.
- Take your time, and pay great attention while handling lenses, especially thermal lenses.
- Remove any specks of dust from the lens’s rim by gently scrubbing it with a brush.
- Next, clean the Lens by wiping it down with a moist Microfiber to remove any dirt or paint smudges.
- To finish washing the mask, just submerge it in the dish soap.
- Use the toothbrush to clean the mask and the surrounding area, including the foam. Just give it a good scrape to remove any soap, water, or dust trace.
- Let the glasses and the mask air dry for a while.
Step 6: Lubricate the Gun
Before reassembling your paintball gun, lubricate all moving parts using oil or lubricant designed for such devices. Before proceeding, ensure that the firearm is completely dry. You should use oil specifically designed for paintball guns; we’ve already highlighted this importance. If you want to keep your gun in top shape, looking around online for supplies is best. Use as little or as much lubricant as necessary. There should be just the right amount of oil so that your pistol operates smoothly and smoothly, but not so much that it drips out of the barrel and hinders your performance. Be cautious not to over-lubricate or over-oil the O-rings; a little coating is needed. Now that your weapon has been thoroughly cleaned, dried, and oiled, you may put it back together and head back onto the field.
Step 7: Reassemble the Marker
After cleaning the gun thoroughly, you may put it back together. When putting things together, refer to the owner’s handbook. We also suggest reviewing the disassembly reference video you made at each stage. Return the paintball marker’s CO2 cartridge to its housing by pushing it in from the bottom. Get the firing mechanism lined up with the bolt and striker. Put the paintball marker’s trigger back on the body. Attach the accessories you may have removed, such as hand grips or sights. The paintball gun’s barrel should be reattached at this point. Make sure it fits tightly so the paint doesn’t leak.
Step 8: Gas Back Up
You started by removing the gases from the gun at the beginning of this procedure. Now fill it back up with petrol. It is essential to remember to fulfill your tank appropriately for reasons of both waste and safety. You must use the correct filling procedure and pay attention to the gauge on your marker’s tank. When dealing with CO2, things might get highly complicated since you have to watch out for the gas coming in liquid form. Take your time and ensure the barrel is pointed upward and away from anyone or anything in the area.
Gabrielle
I am a software engineer and also a paintball dye hard with a great vision about the safe promotion of paintball around the world. I am fond of buying different paintball guns and paintball masks for experiments and reviews on those for my users, for that purpose i made this website.